
This guide will explain how to repair a failed or loose DC power jack on a laptop computer yourself. Here’s my previous post related to DC power jack related issues.
Disclaimer: I’ve made these instructions only for people experienced with soldering and repairing computers. If you don’t feel comfortable doing this job, please do not open the laptop or you can permanently damage your computer. Take your laptop to a professional repair shop instead.
Use this repair guide at your own risk.
First of all, you’ll have to disassemble your laptop and remove the motherboard. Here you’ll find disassembly instructions for some major laptop brands such as IBM, Dell, HP, Compaq, Toshiba. If your laptop is not on the list, you’ll have to figure out yourself how to take it apart.
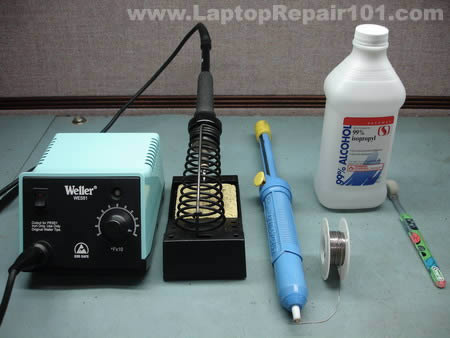
For this repair you’ll need the following tools.
1. Soldering iron or soldering station. I use Weller WES51 soldering station and for this job I set temperature to about 800-850°F.
2. I use high-tech rosin core silver-bearing solder from Radioshack with diameter 0.022″ ( Catalog #: 64-013 ). I think standard rosin core solder will work just fine.
3. Desoldering pump for removing solder around component leads. I use Edsyn Soldapullt pump, model DS 017.
4. 99% isopropyl alcohol and tooth brash for cleaning the motherboard from flux.
5. A new DC power jack, you can find a cheap one here.
Laptop DC power jack repair guide.
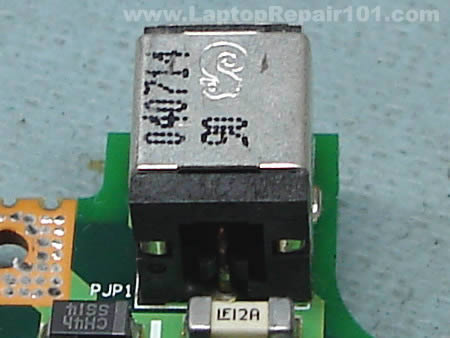
As you see on the following picture, the solder drop on the positive terminal looks different than on other three contacts. That’s where the problem is. The positive pin is not making a good contact with the motherboard and because of that power to the laptop cuts off when I move the power plug inside the power jack.
(more…)
No comments:
Post a Comment